Skip to main content

How To Use Highlighter: Luminizer Tutorial

In the sultry, steamy days of summer, dewy-fresh skin looks most natural. In winter, skin needs extra moisture and a hint more color to look awakened and bright.
Creating beautiful skin no matter what season is easy when you have the right tools and know how to use them. One of the most important tools for keeping your skin looking radiant and real is a highlighter.
A highlighter can give your skin a healthy radiance if it is applied correctly.
Whether you’re a highlighter novice or a glow goddess, we’ll give you the step-by-step guide to applying highlighter like a professional.
Are Luminizers and Highlighters the Same Thing?
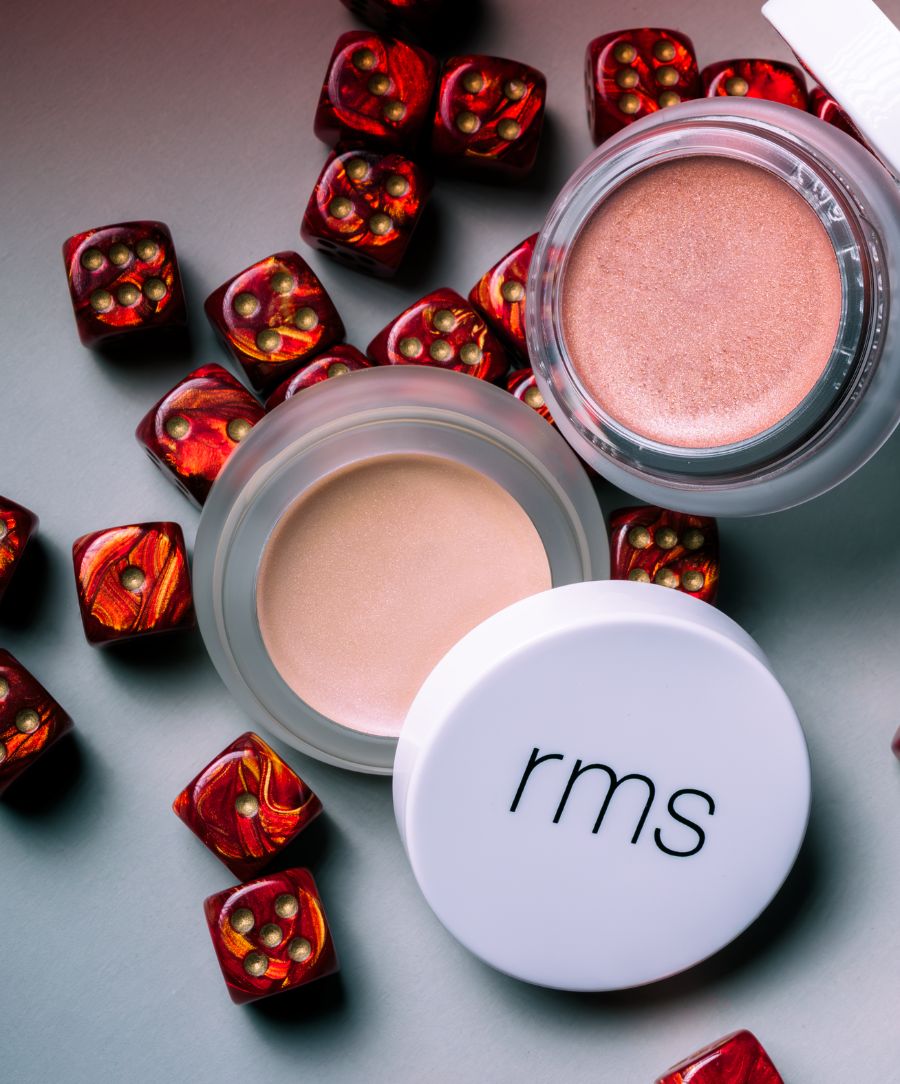
If you’ve visited us here at RMS Beauty in search of a highlighter, you might be surprised: no highlighters are listed in our product lineup. While we do have a product that is used for highlighting, simply put: it’s just too amazing to simply be called just a highlighter.
RMS Beauty's Luminizer is the original skin-illuminating beauty necessity, created by our founder, Rose-Marie Swift, as a solution to keeping her models’ skin looking radiant and real while on set. Rose-Marie created Luminizer because she wanted a product that highlighted her models’ skin without looking obviously “done up” and glittery.
At the time, no product existed that both nourished the skin to keep it hydrated and left behind a true, dewy glow. Although highlighters and illuminators existed, both had micron particles that were too large to look natural when applied to the skin. Thus, Swift created the perfect product by mixing her own formula of natural oils and healthy skin ingredients, and Luminizer was born.
The creation of this product was so popular that numerous brands have joined the party, creating luminizers of their own. Call us biased, but we still think RMS’s Lumiziner reigns supreme.
What Does a Luminizer Do?
A luminizer does the job of both a highlighter and an illuminator. If you aren’t familiar with those two products, here’s a little background.
-
Highlighters. A highlighter is a product applied to certain areas on the skin to draw attention and create a healthy, natural shimmer by attracting light where it’s applied. Highlighters can create the look of higher cheekbones, a more structured brow, and even more defined lips.
Highlighters are used only on certain parts of your face like your brow bone, cheek bones, and cupid’s bow. Highlighters are available in cream, powder, and liquid form.
-
Illuminators. Illuminators are products that give your entire face an all-over glow. You can find illuminators in liquid, powder, or even cream form. Illuminators are usually applied over your entire face and neck to brighten your skin and give it a dewy complexion.
Because an illuminator is designed to keep your skin looking bright all over, you’ll usually find it in a softer color or shade than you would a highlighter.
A luminizer is a combination of both of these products. It’s a great hybrid tool for using on areas of your face and body (think collarbones, shoulders, and hands). Luminizers create a more flawless, natural look because unlike a highlighter, they don’t create color that is as noticeable, and unlike an illuminator, they aren’t so soft and subtle they can’t create a little drama.
RMS Beauty’s Luminizer gives off a light reflective glow to elevated areas of the face.
How Do You Use Luminizer?
You can use a luminizer in the same ways you’d use a highlighter. Although you can use a luminizer in the same areas you would normally use an illuminator, we don’t recommend covering your skin in luminizer.
Luminizers work best as tools to awaken your skin naturally. You’ll use a luminizer to create a little shine and draw attention to areas of your skin that would normally remain a bit dewier than others. Luminizers need to be strategically placed on eye-catching areas of the face and body.
You can use a luminizer to:
- Breathe life back into your skin once you’ve applied your foundation
- Create the illusion of lifted bone structure or draw attention to your favorite features
- Reduce the appearance of “trouble spots” on your skin
- Capture a “just finished hot yoga half an hour ago” glow all day long
While luminizers are fairly easy to use, they aren’t necessarily foolproof. It takes a little know-how to apply them correctly. If you apply them incorrectly, you could end up looking shiny, or so glowy you look radioactive.
Here’s everything you need to know about using a luminizer properly to create a flawless finish everyday.
Put It On After Foundation
Watch a makeup tutorial on Instagram and you’ll likely see various highlighting products being applied before and after foundation. This is not only unnecessary, it completely smothers your skin and doesn’t create a believable finish.
Luminizers work best when they have as little product underneath as possible, so keep that in mind as you apply your foundation. Apply your luminizer after your foundation. If you apply it before your foundation, your foundation will only cover it up.
If you want a product to smooth your skin, fill in tiny wrinkles, and help your foundation glide on with ease, use a primer with jojoba oil.
Foundation is notoriously opaque and flat. While it does create the backdrop for the rest of your products, foundation can leave your skin looking lifeless.
Start off with a better foundation, like RMS “Un” Cover Up Cream Foundation. Our cream foundation is buildable, which makes it great for getting more coverage in areas that need it and less coverage where you don’t.
Instead of applying a thick layer of foundation all over every inch of your face, begin by applying foundation in areas that need coverage. Remember, you can always add a layer of foundation if you need more coverage, but it’s more difficult to take it off.
Once you’ve applied your foundation, you can begin using your luminizer.
Apply It Strategically
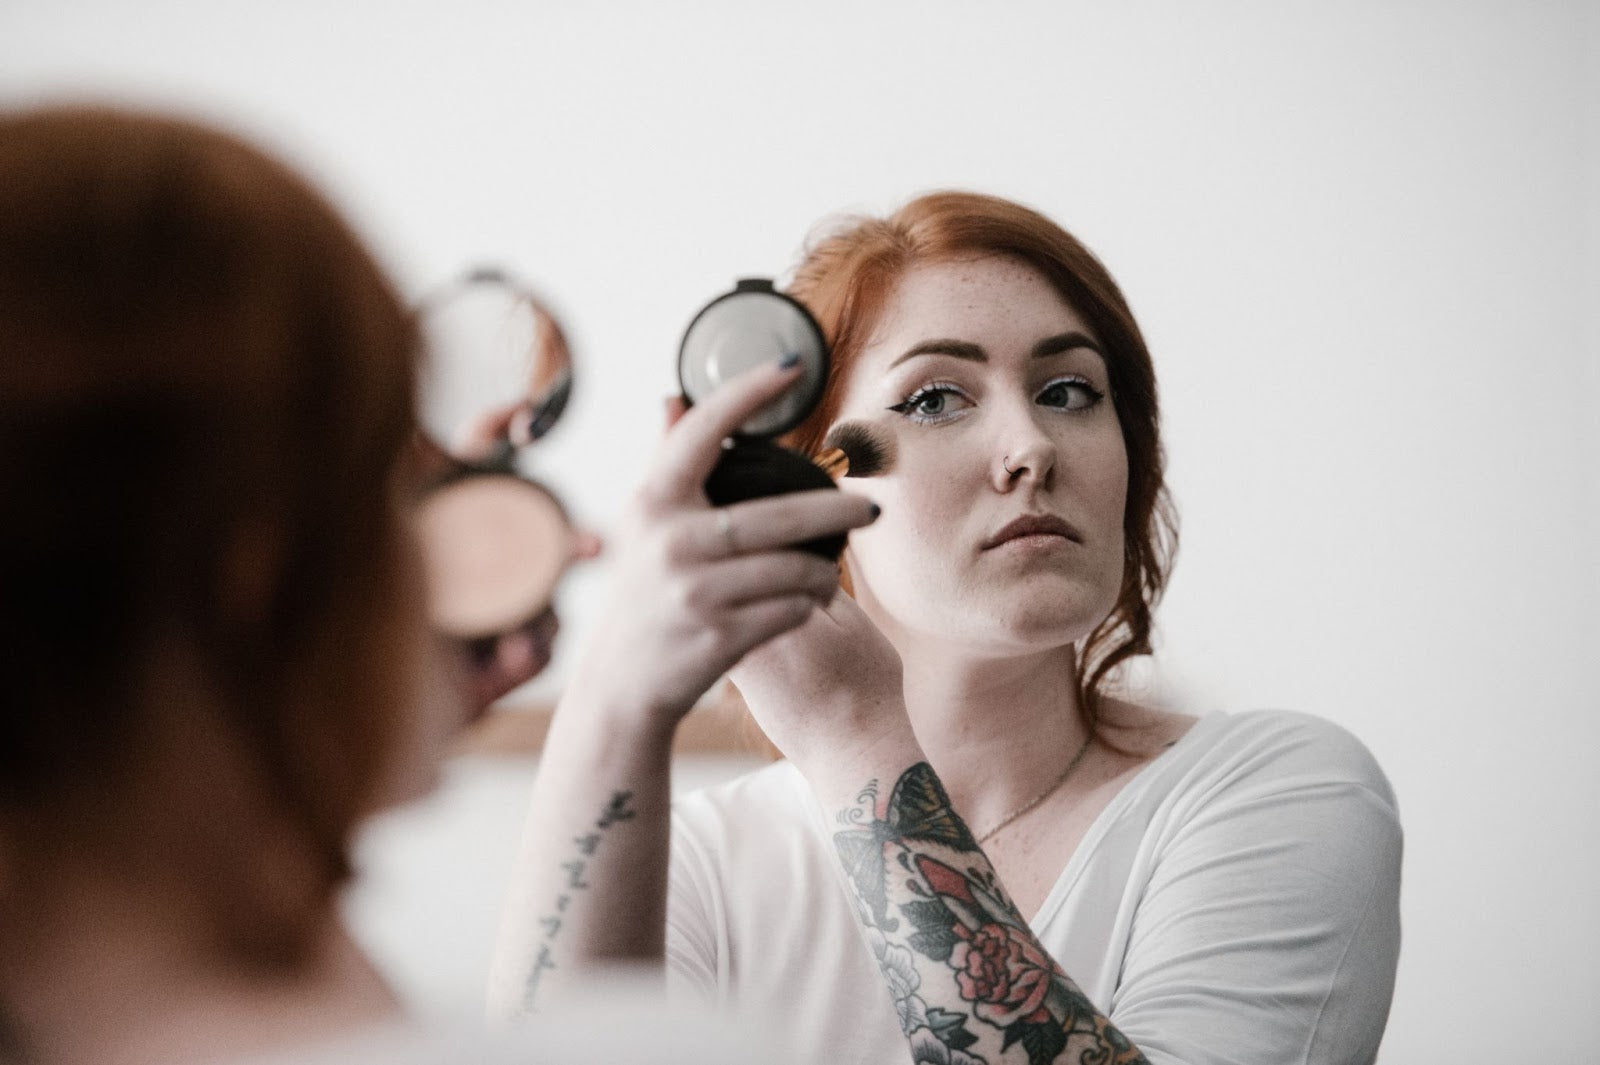
Be careful with your application. Start by applying a small amount, remembering you can always go back and add more. You’ll start by applying your luminizer to areas you want to accentuate.
Where to Apply
Focus on areas like cheekbones, chin, cupid’s bow, nose, forehead, collarbone, center of the eyelid, and under the eyebrows, depending on what you want to accentuate. Here, luminizer is being used as a highlighter, so you’ll want to go easy, and create just a hint of light-reflecting color.
- Cheekbones: Using your fingers, apply luminizer to the highest point of your cheekbones, being sure not to apply product too closely to the center of your face. Stay on the outer edges of your cheekbones, focusing closer toward the area below the outer areas of your eyes instead of closer to your nose. Applying luminizer closer to your nose will make your skin look greasy, not glowy.
- Chin: Apply a small dot of luminizer to the center of your chin, just below the center of your bottom lip. Only a small amount is needed in this area. If you have oily skin, you can skip this spot, unless you’ve got a lot of product on the chin (i.e. if you’ve covered a blemish, etc.)
-
Cupid’s bow: Many tutorials will tell you to apply highlighter to the philtrum, which is the area between your nose and your cupid’s bow. This is a mistake and honestly, makes it look a little like you have a sinus condition.
Instead, apply a small amount of luminizer with either a brush (try RMS Beauty brightening brush for precision) to the ridges of your cupid’s bow only. Apply luminizer before your lip color for a more natural look.
You can also use luminizer on bare lips to add a beautiful, natural sheen and a three-dimensional look. Apply a small amount to the center of your bottom lip and top lip.
- Nose: To add a little shine and create dimension, add a small amount of luminizer to the bridge of your nose only. Apply luminizer straight up and down, not across. Begin no higher than just below the middle of your eyes and sweep downward towards the tip.
-
Forehead: Applying luminizer to your forehead can be tricky. You’ll want to avoid using a large amount of product, and also opt for a shade that is more transparent. Avoid a darker luminizer as it can make the forehead look heavy or even dirty.
Apply a small bit of luminizer in the center of your forehead, just above your eyebrows to create an ethereal look of dewy moisture. Be careful to only use a small amount. Too much luminizer on the forehead can cause your skin to end up looking greasy.
-
Centers of eyelids and corners of eyes: Most everyone will want to use a luminizer on their eyes to draw attention to them. We recommend applying luminizer before applying your shadow or eyeliner to create a more natural look.
Using your finger or a brush, apply a small line of luminizer to the center of your eyelid, just above the lash line. Apply a dab of luminizer on the inner “v” of your eyes to brighten them and make them look more open.
- Eyebrows: Use a luminizer to create a higher arch than you actually have. Using a brush or your finger, apply a small amount of luminizer just above the arch of your brow. This will create lift and give the allusion of a higher arch.
- Collarbones: You can use a luminizer all over your body because of its subtle, light-reflective qualities. If your collarbones are exposed, try sweeping a little luminizer over the very tops of them to draw attention to your neckline and extend the dewy glow of your skin.
-
Body: Luminizer is great when applied to well-hydrated skin. Smooth on jojoba oil before applying your luminizer to places like the tops of your shoulders, the outer edges of your arms, the centers of your legs, and the ridges of your shoulder blades (if exposed).
You can even add a little to your knuckles so that the light catches your movement as you walk.
How Much To Use
Less is more. You can always add more product, but taking off product that has been excessively applied is difficult and will ruin any other makeup you’ve already used on your skin. Use a small amount of luminizer and build up as needed.
If you feel like you’ve applied a lot of product but still can’t see it, try looking at yourself in natural lighting instead of immediately adding more product.
Put It On With Your Fingertips
The easiest way to apply a luminizer is with your fingertips. RMS’s luminizer is created with a castor seed oil and coconut oil base which naturally hardens when it is cool. The warmth of your fingertips softens the product and allows it to glide on easily and blend thoroughly.
You can use a brush with a fine tip to apply luminizer to areas that require a little more precision, such as your cupid’s bow or the inner corners of your eyes. Try testing your brush application on the back of your hand or arm to make sure you know how the product performs with the brush before using it on these areas.
Blend well — you don’t want any lines where the luminizer starts and stops.
Use Upward Motions
The goal of a luminizer when used as a highlighter is to lift and create the illusion of higher bone structure. When applying your luminizer to areas like your cheekbones, the bridge of your nose, and the arches of your eyebrows, use upward sweeping motions.
If you sweep your luminizer on your skin in a downward motion, you’ll end up with luminizer on areas of your skin where you certainly don’t want it, like the middle of your cheeks, your eyebrows, and under your nose.
Can Luminizers Replace Bronzer?
This really depends on how much natural color you already have and the look you’re trying to achieve. A bronzer differs from a luminizer in that it does have slightly more pigment and a bit more of a bronzed, sun-kissed look.
A luminizer will create a dewy skin look that is great for any skin tone in any season. It will awaken and revive skin and make it look more natural.
A bronzer will always give your skin a sun-kissed look. The undertones in a bronzer are meant to make your skin look like you’ve just returned from a Mediterranean vacation.
RMS’s Buriti Bronzer is formulated with skin-nourishing buriti oil and is flattering on all skin tones. However, it can be used as a highlighter on darker skin tones.
Which Luminizer Shade is Best for My Undertones?
RMS Luminizer is available in six different shades ranging from pearl-esque translucent to golden. While you can certainly use all of them on virtually any skin tone to create different looks, here is what we recommend.
Pearl Finishes
Our Original and Magical shades have a beautiful opalescent finish that works well with pale to light colored skin and purple/blue undertones. If you use a light color of foundation and are most comfortable with cool tones, you’ll want a pearl finish.
However, our original luminizer is a great shade for any skin tone. Because it is virtually translucent, it works synergistically with any skin undertone to create a healthy, believable glow.
Pink Finishes
Pink finishes, like RMS Luminizer in Champagne Rosé and peach, work well for medium skin tones and olive undertones. These shades have a hint more color which stands out on medium-toned skin without creating too much shine or drama.
Original luminizer is still a great fit for medium skin tones, and is a great everyday shade.
Gold Finishes
Gold finishes are best for darker skin tones. Our Amethyst Rose and Gold shades create depth, radiance, and a gorgeous, natural finish on darker skin without looking glittery or too heavily bronzed.
Original luminizer is also a great shade for dark skin tones, as well as our Buriti Bronzer, which can be used as a highlighter on very dark skin tones.
What Should I Look for in a Luminizer?
As with any cosmetic product you choose, look for real ingredients that are as close to their natural state as possible. Some luminizers contain talc, which can be harmful and irritating to your skin.
RMS Beauty crafts our products with living, food-grade ingredients. Our luminizers contain raw, organic, coconut oil, caster seed oil, and vitamin E to keep your skin hydrated and healthy while giving you the flawless look you love.
Here are our must-have luminizer ingredients.
Coconut Oil
One of the best ingredients for cleaner, greener, skincare, RMS coconut oil is always organic, always raw, and always cold-pressed. We don’t use heat in the extraction of our coconut oil, because it changes the structure of the molecules in the coconut oil and strips it of some of its benefits.
Our luminizers contain a coconut oil base, which helps it glide easily onto your skin, nourish it, and keep your skin bright and beautiful.
Castor Seed Oil
Rich in fatty acids, castor seed oil is a natural anti-inflammatory, helping to calm and soothe troubled skin. It’s also a great base for a luminizer because it deeply hydrates the skin and helps the product apply smoothly and evenly.
Jojoba Oil
Jojoba oil is the closest oil to our own human sebum. Jojoba oil easily blends into skin and is absorbed easily, never leaving skin greasy. Full of antioxidants, it’s excellent for hydration and can be found in select shades of our luminizer.
We also recommend using jojoba oil as a primer before applying your foundation. You can find jojoba oil in our Beauty Oil and Beauty Body Oil. Both products are perfect for priming and hydrating skin prior to makeup and luminizer application.
Rosemary Extract
Rosemary leaf extract is a plant-based ingredient that is full of skin-protecting antioxidants and even boasts cleansing properties. Rosemary leaf extract is often added to products to help condition the skin, as it leaves skin feeling soft and supple.
Rosemary extract also has a pleasant scent that provides fragrance to a product without the use of dangerous and/or skin irritating chemicals.
Beeswax
Beeswax is a natural wax that is better for your skin. Naturally secreted from honeybees, our organic beeswax helps protect the skin from environmental stressors and creates a moisture-retaining barrier unparalleled by any other wax.
Beeswax has natural antibacterial and antimicrobial properties, is rich in vitamins, minerals, and skin-protective antioxidants.
Shine On!
Using a luminizer is a great way to create dewy, glowing skin without a lot of heavy makeup artillery. You can create a flawless finish with a sweep of this multi-purpose product and enliven your skin, create the illusion of higher bone structure, and even add a hint of dramatic shimmer.
Using your luminizer correctly is key. Because a luminizer is both a highlighter and an illuminator, you aren’t limited to application solely on your face. You can apply luminizer on your face, collarbones, shoulders, and even your arms and legs!
Quality of ingredients is important for a luminizer, as you’ll use it frequently and on delicate areas of your skin. RMS Beauty’s commitment to cleaner, greener ingredients makes our luminizer a product you can feel safe using on your skin.
When you’re ready to use a luminizer, keep this guide close and make sure you’re using the original luminizer created by Rose-Marie Swift herself. You’ll only find it here, at RMS Beauty. Shine on!
Sources:
Theobroma Cacao (Cocoa) Seed Butter|Cosmetics Info.org
EWG Skin Deep® | What is ROSMARINUS OFFICINALIS (ROSEMARY) LEAF EXTRACT
Shop The Blog
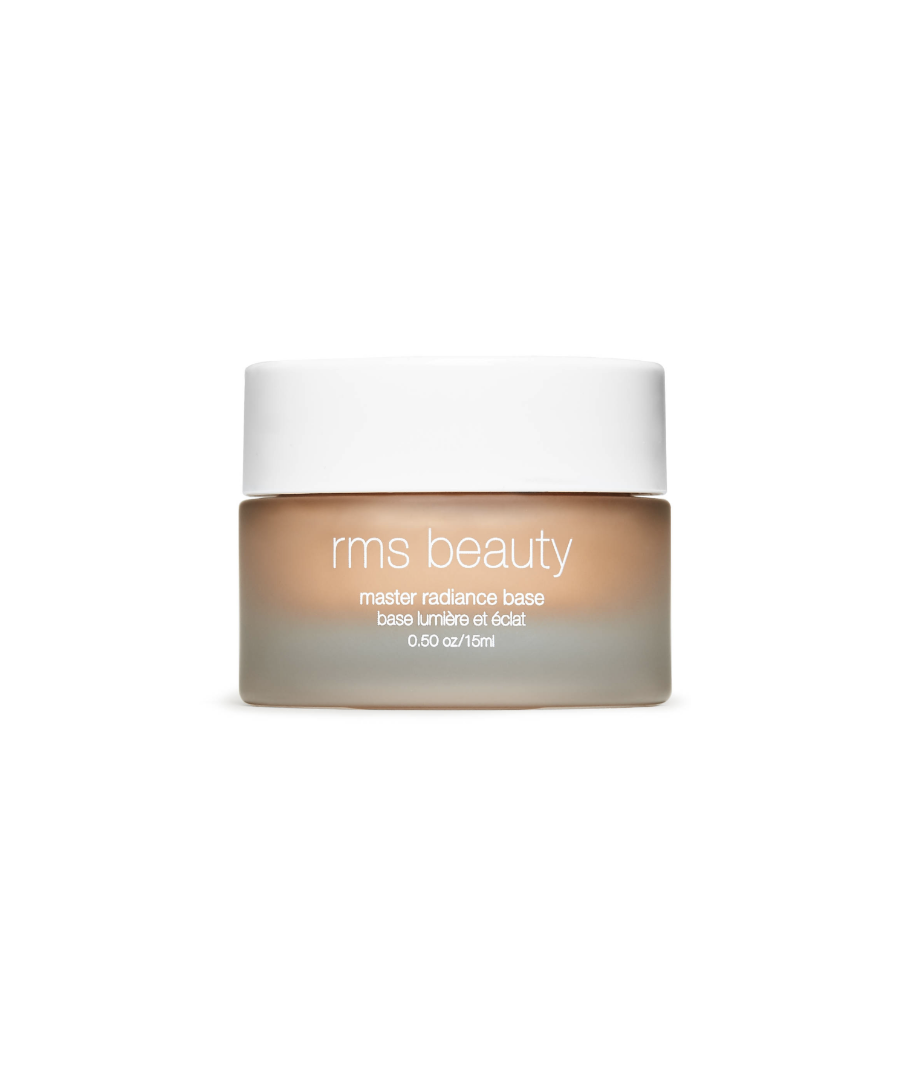
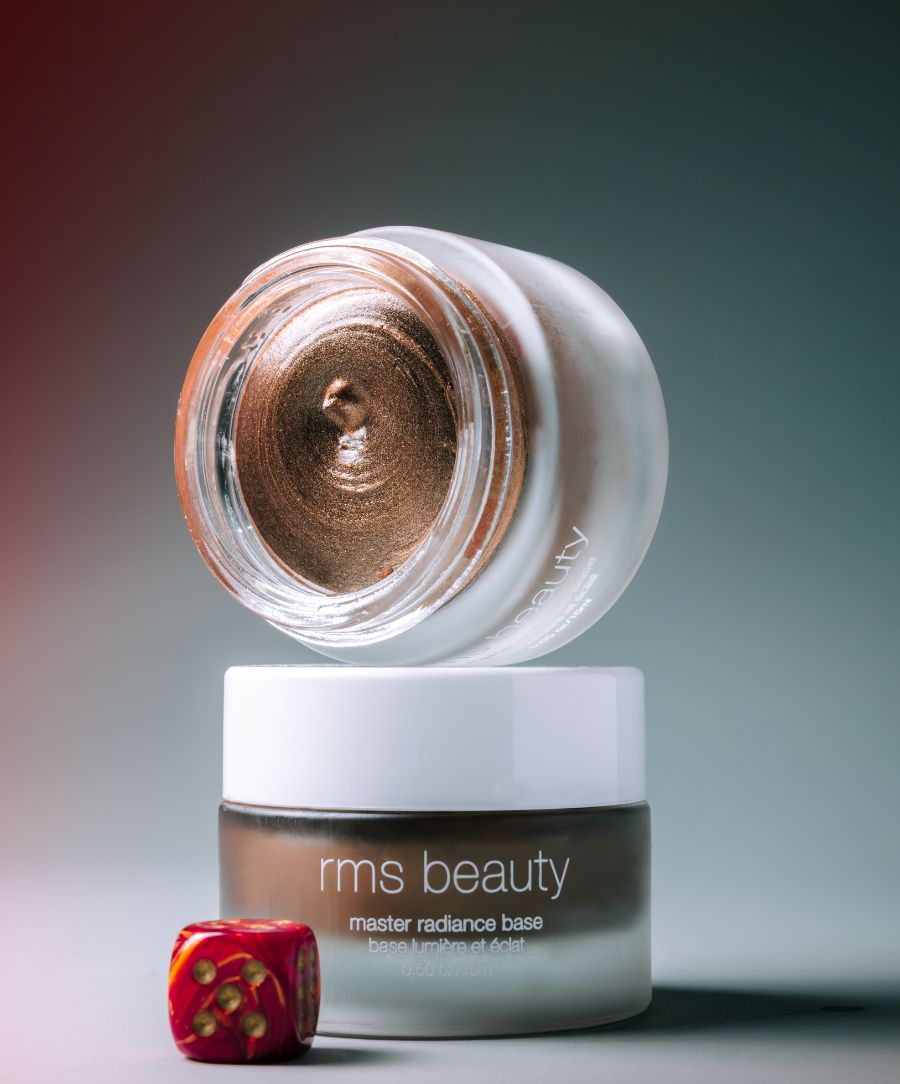
Master Radiance Base
Luminizer